
![]()

|
|
Step 11 - Inlays
 |
Once dry, the
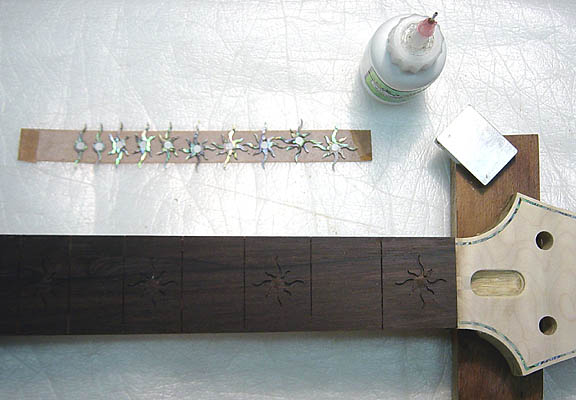
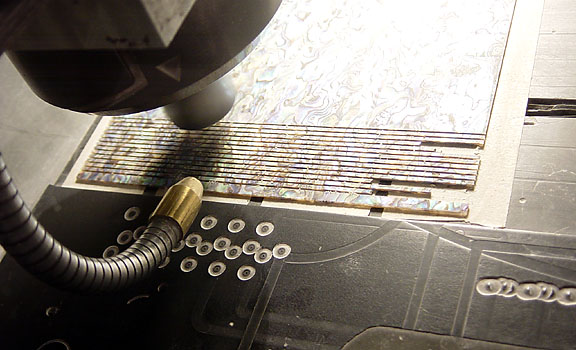
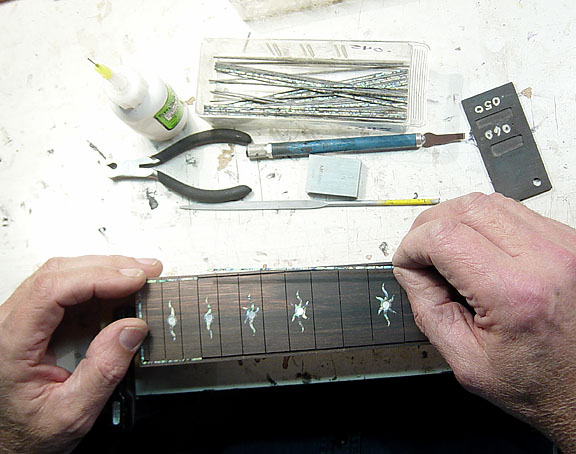
neck is removed from the jig and the Firesun inlays must be installed. The cutting out of
the firesuns on the CNC are shown in a different step. I pre-glue the pearl dot in the
center of each Firesun first. The fingerboard is glued to the neck with the inlay cavities prerouted. A complete set of Firesuns are shown upside down ready to be inlaid. The bottle of glue is thick viscosity cyanoacrylate adhesive (CA) or super glue. The little steel block is known as The Magic Block around the shop. He is nothing more than a 1" gauge block but he is responsible for the installation of practically every piece of inlay we have done in 10 years. Oh Magic Block my friend - you never let me down . Will explain his special purpose soon. |
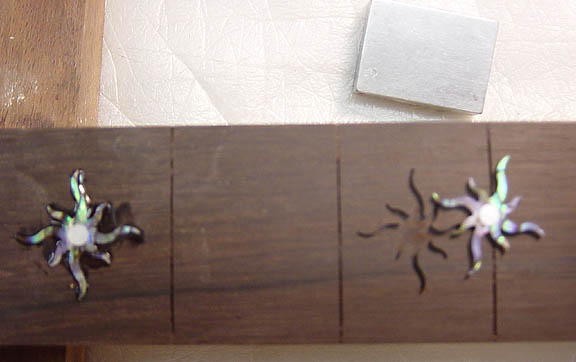 |
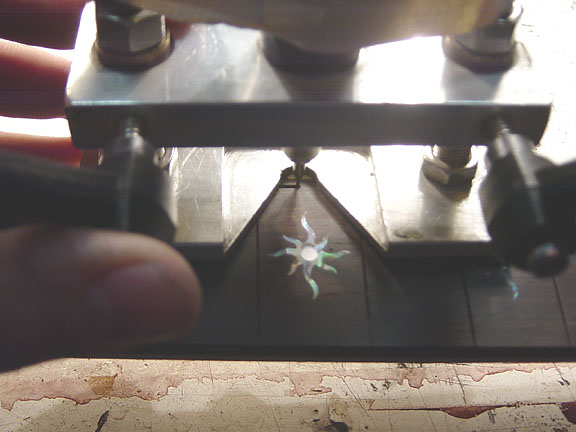
Slightly out of focus, but the basic idea is to fill the cavity with CA, position the Firesun inlay into the cavity then use The Magic Block to push the inlay down until it bottoms out in the cavity which leaves is just a little proud of the fingerboard surface. |
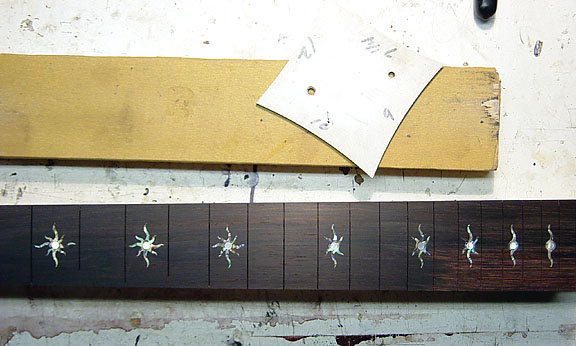 |
Once all the
Firesuns are inlaid, the fingerboard must be leveled. The final truing of the board
doesn't happen until the back of the neck is final shaped and it is ready to fret. Wood is
constantly under stress and even the slightest removal of wood on the back of the neck can
change the internal stresses and tweak the board just a bit. A radius gauge (shown) is used to verify that a flat spot isn't being sanded into the neck during leveling. |
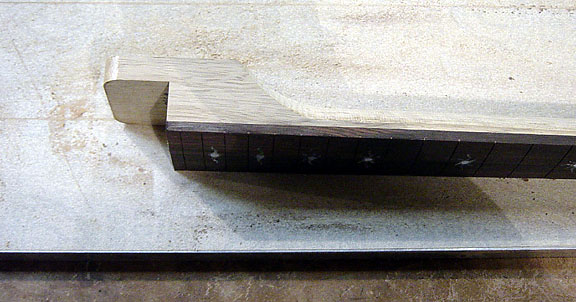 |
A strange image
to figure out but here is the lowdown. The neck and fingerboard are both milled .015"
oversized to the neck pocket. This little extra meat allows for me to final sand the neck
heel down until a perfect precision fit is made with the body. The CNC is more than capable of machining it right on the money the first time, but since we are dealing with wood - wood changes and moves. Moisture and humidity and even temperature all play a factor with wood. A tight neck to body joint can suddenly become a sloppy fit the next day due to a drop in humidity. A neck pocket is a touchy area and best to be finalized right before glue-up. I use a cast and ground plate of aluminum with self stick sandpaper to sand the sides of the neck and heel until it is a press fit into the pocket on the body. I will final sand it literally seconds before it is time to glue it in. |
 |
Purfling! That is a sheet of Paua Abalam being ripped into purfling strips for the fingerboard. It takes about 3/8 of an entire sheet for full purfling on a body's top and sides, fingerboard, and headstock. |
 |
Routing for the fingerboard purfling. That blurry contraption is my home-made Dremel router base. It has a flat bottom with a ledge or guide that is offset from the cutter. That ledge slides along the edge of the finerboard while the bit routes a channel parallel to the edge. Fairly simple but results in a nice clean channel all around the finerboard. |
 |
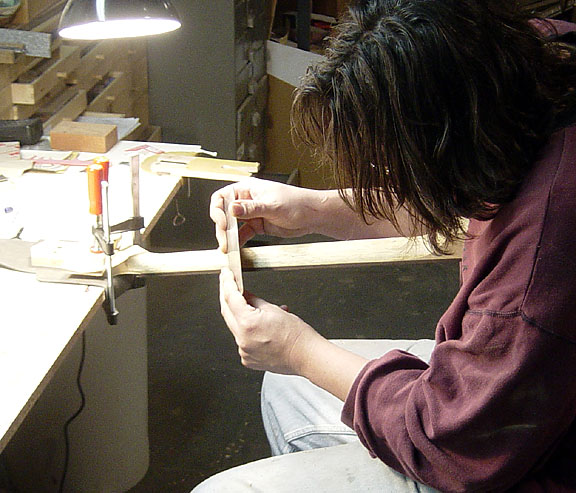
"I don't
know nuttin' 'bout purflin' no bodies..." Pops at it again. Everything needed to install purfling: Routed channel, an assortment of Paua purfling strips, nippers so each strip can be nipped to end on a fret slot, file and chisel for mitering the corners at the heel end, CA glue with a fine tip, and of course...The Magic Block. |
 |
Unidentified Yeti drilling for side dots. I still do this operation old school. I lay out each dot location with a scale and fine pencil then dill the hole to depth. I plan on making a drill jig to drill the fingerboard for side dots before it is glued to the neck...one of these days. In the mean time it's this way. Each hole is filled with CA and a 3/32" pearl dot is positioned and pressed in flush with the side. |
 |
Same Yeti starting to final shape the back of the neck. This is the first operation where I am using a scraper to blend the neck into the fingerboard. A scraper is a piece of spring steel that has a burr drawn on it. This burr is razor sharp and acts like a plane as it is pulled across the wood. If you've ever sliced your finger on a metal burr you know how sharp it can be. |
| Go to Step 10 page | Thorn #030 Completed | Go to Step 12 page |