
![]()

|
|
Step 10 - Neck Glue-up
 |
Everything
needed to make a neck, from top to bottom - Brazilian Rosewood fingerboard, slotted, perimetered, radiused and routed for inlays (see Step 7). Low density "filler strip". This little strip goes in the bottom of the truss rod channel and dampens the truss rod preventing any vibrating or rattle.\ Quilt maple "filler strip" - this retains the rod in the slot. 3 Delrin locating dowel pins. Double acting truss rod. This version is my favorite design requiring the shallowest channel that I know of. Oh yeah, and a neck. |
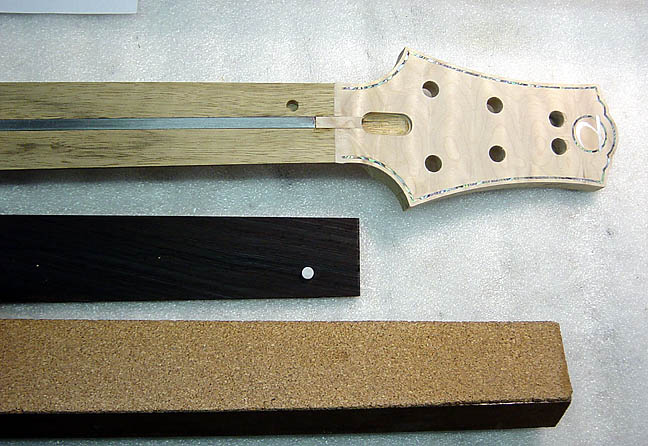 |
The truss rod
is installed and the maple filler strip is glued in and leveled. The dowel pins are
installed into the underside of the fingerboard. On the bottom is a clamping caul. This has a matching concave radius down it's entire length. That radiused cove is then cork lined to prevent damage to the board while glueing. |
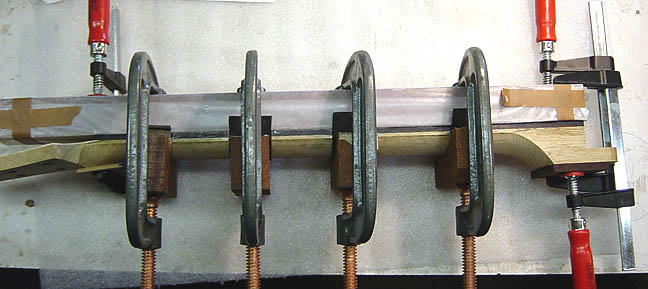 |
The fingerboard
is glued on using a two-part epoxy that is specifically for oily woods, such as rosewood.
I have Mr. Paul Smith to thank for that product info. It was one of the many
"tips" he was kind enough to share with me at the last PRS Forum event dinner A number of radiused cauls are used on the back of the neck, 7 total, along with a couple clamps on the heel and one at the nut for good measure. 24 hours later...time to starting trueing the board and final carving the neck to spec. |
| Go to Step 9 page | Thorn #030 Completed | Go to Step 11 page |